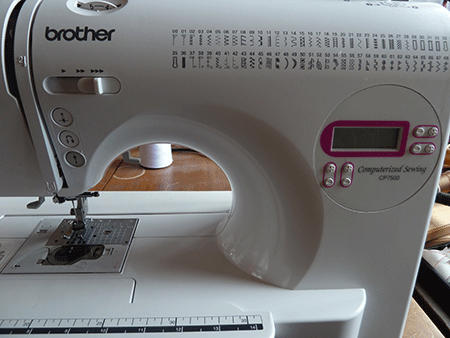
 Shortly before I moved I decided to upgrade my Brother sewing machine. I purchased a new model with more decorative and utility stitches than the previous one, and still light enough to carry around with me, if necessary.
 At the time, my niece Ana Lía had decided to take up quilting and worked on a very simple Singer sewing machine. In view of her many talents, I decided to give her my “old” perfectly good Brother sewing machine, along with the Stitch Bible I had made for it, which I learned in the Stupendous Stitching class I had taken early in 2012.
 The idea behind a Stitch Bible is to sew all your stitches so you have a visual reference of what they look like. You don’t just use the default settings, but play with both stitch width and length on each stitch. This can really alter the way a stitch looks, and expands your stitch repertoire.
 I found it very useful to have these reference “sheets,” especially for embellishment projects. But I hadn’t gotten around to making a Stitch Bible for my now-not-so new sewing machine. Time to do so now… and to share the process, in case you would like to make one, too.
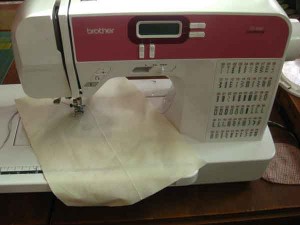
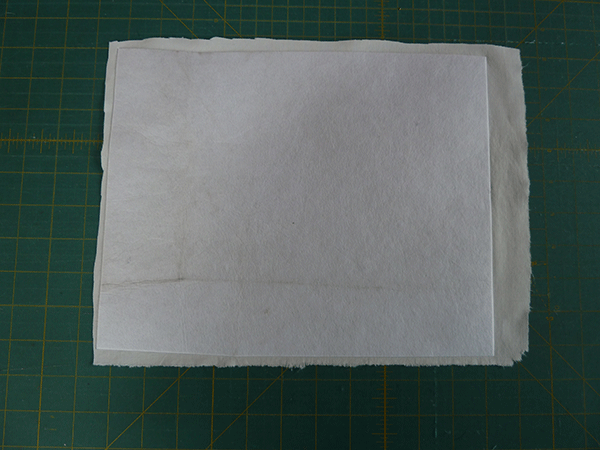
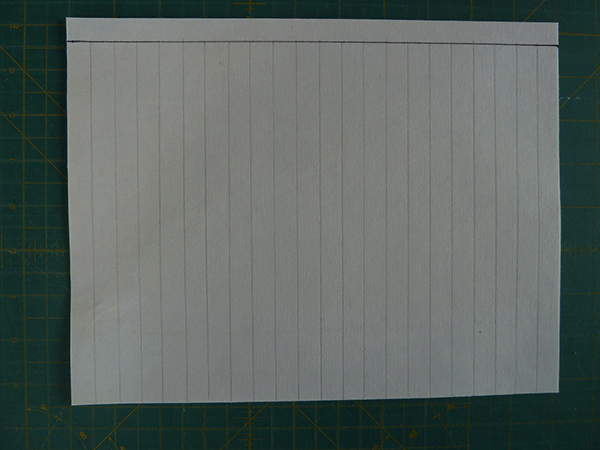
I started by fusing a piece of heavy weight interfacing (fusible) to the back of a plain piece of fabric. I cut both slightly larger, and then trimmed to 8½ x 11″.
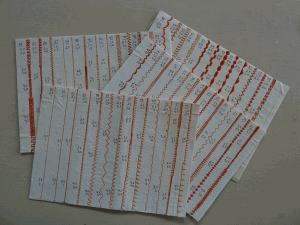
With a permanent marker, I drew a line ½” from one of the long edges, and a series of lines ½” apart from each other perpendicular to the long line. These would then be my guides for each stitch, with its variations. BTW, you might find ½” space between stitches can actually be pretty small. Although this worked for me, you might want to consider increasing that to ¾”. Just note that in that case you will have to prepare for fabric “sheets” to fit all the stitches.
I placed the number of each stitch at the top of each line, and then started sewing each stitch at the default setting, adding two or three variations as I went along by playing with both the width and length settings. These settings were written down on the left side of each variation. In some cases, these variations actually produce what you could consider completely new stitches. This means that by altering both the width and length settings, theoretically you could be multiplying your stitch repertoire three or even four times!
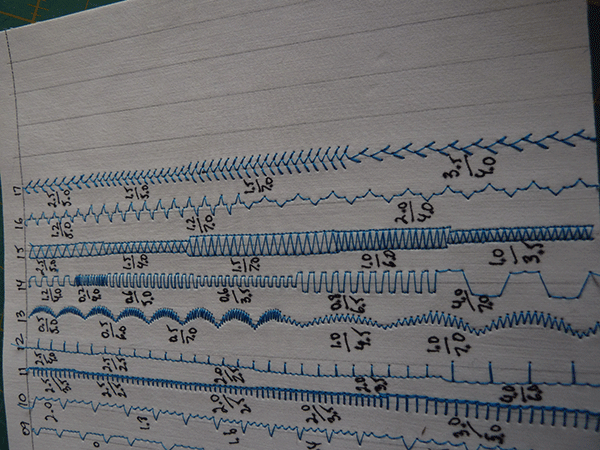
 It dawned on me that one of my old Singer sewing machines also has some decorative stitches, and that it would well be worth my time to prepare a Stitch Bible for this machine, too. In this case, the width settings are pretty limited, so I pretty much stitched everything out at the largest width setting, but did play around with the stitch length. I also used a different color thread, just to have a visual difference between the two machines.
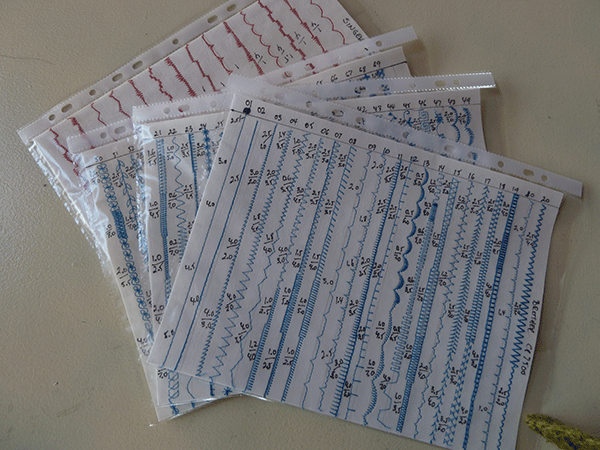
Once I finished stitching out all the stitches, I placed the fabric sheets in sheet protectors. That way I can keep them in a folder next to the sewing machine, along with all my manuals.
I hope you find these tips useful… I highly recommend doing this for any machine you have with decorative stitches!
 I am a self-learner. I taught myself to sew and to quilt. And I taught myself how to draw. I love to dye my own fabrics, am a fanatic of free-motion quilting, and dabble with mixed media. I am a quilt designer and teacher, and design and publish my own line of quilt patterns. With this blog I would like to share the bits and pieces of my life.

4 Comments
what a great idea must do
What a great idea. Thank you – I will definitely make myself a stitch bible.
Claire
Angie that is a fantastic idea and will certainly save time and make life simpler. I will have to sit and play on both my Viking embroidery machine and my Viking Lily 545. I’ve had both machines for a while and never even thought about doing a stitch bible.
Thank you from the bottom of my heart! You always have great ideas, techniques AND patterns!
All the best my dear friend – Terri at the Drake’s Nest in Palm Bay, FL
Angie, I love it. I just upgraded to a new Brother SB4138 machine and have been playing around with new stitches but it didn’t occur to me to do this. I’m a bit of an organization nut (freak) so the sheet protector idea is icing on the cake.
I always enjoy all the great ideas on your site. Thanks.