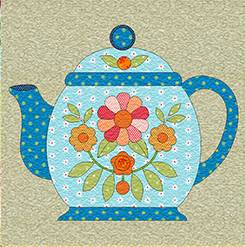
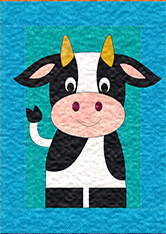
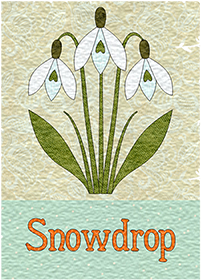
 So far, we have completed a series of blog posts focusing on the ins and outs of hand applique, covering five different techniques, from needle turn hand applique to reverse applique. There is no one way to applique, but… we will probably all admit to having a favorite method. In this blog post, we’ll dive a little deeper into the technique of turned edge applique using freezer paper. As a long-time quilter, I have explored various hand applique techniques, struggling with some and nearly perfecting others. Today, I’d like to delve a little deeper into the wonders of freezer paper applique. This technique has become my go-to method for achieving precise and beautiful results. In this comprehensive guide, we’ll cover what turned edge applique is, how freezer paper and starch aid in the process, when and why to use this technique, and essential tips for success. Let’s embark on this applique adventure!
1. What is Turned Edge Applique?
Applique, in general, involves attaching fabric shapes onto a background fabric, creating beautiful designs and adding texture to quilts. Turned edge applique takes this a step further by turning under the raw edges of the applique pieces before stitching them down. This meticulous technique results in a clean and polished finish, giving your projects a professional look.
2. The Magic of Freezer Paper
Freezer paper comes to the rescue when it comes to turned edge applique. With its shiny coating on one side, freezer paper temporarily adheres to fabric when pressed with a hot iron. This unique feature serves as both a stabilizer and a temporary adhesive surface, ensuring that your fabric stays in place while you work on turning and pressing the edges.
3. Mastering Turned Edge Applique with Freezer Paper and Starch
Step-by-Step Process
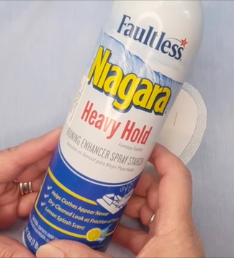 Let’s explore the step-by-step process of using freezer paper for turned edge applique:
- Cut out the desired shape from freezer paper, creating a template for your applique piece.
- Place the shiny side of the freezer paper template onto the wrong side of your chosen fabric and press it with a hot iron to temporarily adhere the paper to the fabric.
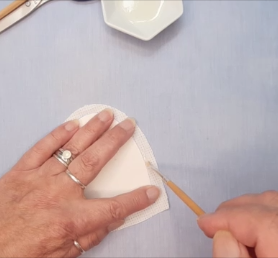 Carefully cut the fabric around the shape, leaving a 1/8 to 1/4 inch seam allowance.
- To ensure clean and crisp edges, brush liquid starch around the seam allowance to stiffen the fabric.
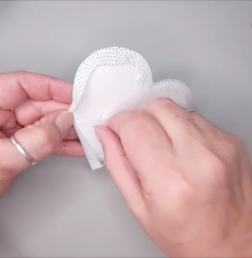 Gently turn the seam allowance under, using the tip of a hot iron, pressing it into place.
- Repeat these steps for each applique piece until you have all the shapes ready for stitching.
Advantages of Freezer Paper Applique using Liquid Starch
Why do I frequently resort to freezer paper applique? Here are some key advantages:
- Quick and Precise: Freezer paper enables you to swiftly turn under the edges of your fabric shapes while achieving precise and neat results.
- Temporary Adhesion: The temporary adhesion provided by freezer paper eliminates the need for pins or other securing methods, keeping your fabric in place as you work.
- Versatility: This technique is suitable for a wide range of applique projects, whether you’re working on large, simple shapes or intricate and complex designs.
Tips for Success
To ensure success with freezer paper applique using liquid starch, consider the following tips:
- Work in Small Sections: Focusing on turning on small sections of a shape at a time allows for better control and accuracy. Take your time and enjoy the process.
- Utilize Special Tools: Consider using a Clover Mini Iron. Its compact size and precise tip make it easier to maneuver and press those tiny edges.
4. Frequently Asked Questions (FAQs)
Let’s address some common questions about turned edge applique using freezer paper:
Q: Can I reuse the freezer paper templates for multiple applique projects?
A: Yes, you can reuse the freezer paper templates several times until the adhesive quality diminishes. This allows you to save time and resources on future projects.
Q: Can I use freezer paper applique on delicate or sheer fabrics?
A: Freezer paper applique is generally suitable for a variety of fabrics, but it may be more challenging to use on delicate or sheer fabrics. The heat from the iron can potentially damage or create shine on these fabrics. It’s advisable to test the technique on a small scrap of the fabric before applying it to your project. If you find that the fabric is not suitable for freezer paper applique, consider using other techniques like needle turn applique or using a lightweight fusible interfacing as an alternative.
Q: How do I remove the freezer paper after completing the applique?
A: Once you have stitched down the applique shape, you can cut a slit on the wrong side of the background fabric and gently peel off the freezer paper.
5. Conclusion
Turned edge applique using freezer paper is a versatile and precise technique that opens up a world of possibilities for your quilting projects. Its ability to quickly turn under edges and obtain crisp shapes is truly remarkable. Whether you’re working on large, simple shapes or intricate designs, freezer paper applique will become your trusted companion. Remember to explore the exciting alternative method of combining freezer paper applique with blanket stitch applique for those extra intricate details.
With freezer paper applique, your applique designs will exude charm and craftsmanship. Embrace the creative journey, experiment with different techniques, and let your imagination run wild. Happy quilting!
Be sure to check out the video tutorial below with step-by-step instructions on how to master Freezer Paper Applique using Liquid Starch.
Have you ever experimented with combining different applique techniques to achieve unique and captivating designs? Share your experiences with us in the comments section below!

 I am a self-learner. I taught myself to sew and to quilt. And I taught myself how to draw. I love to dye my own fabrics, am a fanatic of free-motion quilting, and dabble with mixed media. I am a quilt designer and teacher, and design and publish my own line of quilt patterns. With this blog I would like to share the bits and pieces of my life.