Are you ready to take your quilting skills to the next level? If you’ve been following this blog, you’re already familiar with the art of applique and the various hand sewing methods involved. Today, we’re diving into the intriguing world of reverse applique. This technique will add a unique twist to your quilt designs and allow you to create stunning visual effects. So, let’s explore the what, how, where, and why of reverse applique together!
Understanding Reverse Applique
Reverse applique is a captivating applique technique with a rich history, although its exact origins remain somewhat elusive. In traditional applique, the design is placed on top of the background fabric and sewn in place. In reverse applique, however, the fabric layers are stacked, and the top fabric is carefully cut away and stitched to reveal the design underneath. This technique allows for the creation of complex designs by utilizing multiple layers of fabric. The edges of the design can be finished by hand or machine, depending on your preferences and desired aesthetic. In this post we will be focusing on hand sewing.
Exploring the Benefits of Reverse Applique
Reverse applique offers a range of advantages that make it a compelling technique for quilt enthusiasts:
- Complex Design Possibilities: With reverse applique, you can delve into the world of intricate designs and delicate edges that may be challenging to achieve using other applique methods. The layering and cutting process allows for remarkable intricacy and depth in your quilted creations.
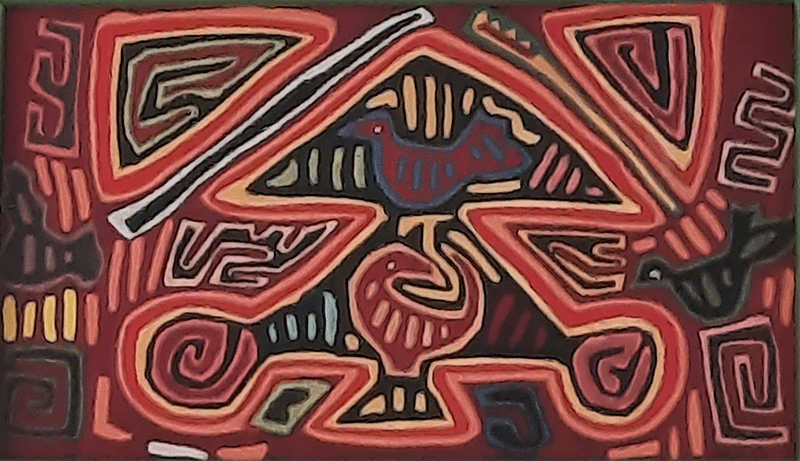
 Embellishing Clothing and Artwork: Reverse applique finds its roots in diverse cultural traditions. For example, the Molas from Panama and Hmong Embroidery from China, Laos, Thailand, and Vietnam beautifully incorporate reverse applique to embellish clothing and create stunning works of art. Drawing inspiration from these rich cultural traditions can add a unique and meaningful touch to your own projects.
Two Approaches to Reverse Applique: Raw Edges and Folded Edges
When it comes to reverse applique, there are two main techniques to consider: raw edges and folded edges. Let’s explore each approach and the effects they can produce.
Materials You’ll Need
Before getting started, gather the following materials:
- A minimum of two contrasting fabrics.
- Sharp scissors: Essential for clean cuts.
- Marking tool: Use a fabric pen or chalk to mark your design.
- Needles and threads: Opt for a thread color that complements your fabric choices.
Raw Edge Reverse Applique
Raw edge reverse applique involves cutting the top fabric layer without folding or finishing the edges. This technique creates a bold and slightly rustic look. Here’s how you can achieve it:
- Begin by selecting your base fabric and contrasting applique fabric. Ensure that the fabrics work harmoniously and create the desired visual impact.
- Layer the applique fabric beneath the base fabric. Pin the layers together to keep them in place during the stitching and cutting process.
- Determine the design you wish to create and transfer it onto the top fabric. You can use fabric pens, chalk, or other suitable marking tools.
- Start stitching around the edges of your design, close to the marked line, using a hand-sewing needle and thread. A small running stitch works well for securing the layers together.
- Once the stitching is complete, carefully cut away the top fabric following the marked lines of your design. Take your time and work diligently to achieve clean and precise cuts.
- Continue the stitching process, securing the edges of the cut fabric to prevent fraying and enhance durability.
- Repeat the steps for additional layers, if desired, to add depth and complexity to your design.
Folded Edge Reverse Applique
Folded edge reverse applique involves folding the edges of the top fabric under and securing them in place before cutting. This technique produces a neater and more refined appearance. And, if you have been giving hand needle turn a try, this technique is exactly the same, except for order of the fabrics. Let’s explore the process:
- Choose your base fabric and applique fabric, ensuring they complement each other aesthetically.
 Layer the applique fabric beneath the base fabric, aligning them precisely. Pin the layers together to hold them securely.
- Transfer your chosen design onto the top fabric with a marking pen or chalk pencil.
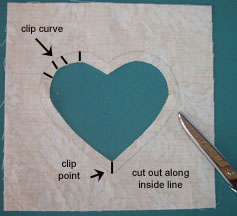 Cut the top fabric leaving a narrow seam allowance – somewhere between ⅛” to ¼” from the marked line. Wherever necessary, clip curves and “valleys”.
- Begin folding down the fabric edge along the marked line, tucking it under with
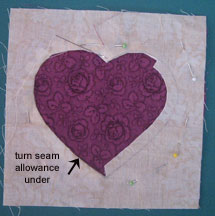 your needle. Use an invisible stitch to sew the seam down.
 - Sew around the entire shape. If you wish, repeat with additional layers to add complexity t your design.
Remember, whether you opt for raw edges or folded edges, the choice is yours to make based on your desired aesthetic and the overall style of your project.
Where Can Reverse Applique Be Applied?
Reverse applique can be used in various quilting projects to add visual interest and dimension. Here are a few ideas to spark your imagination:
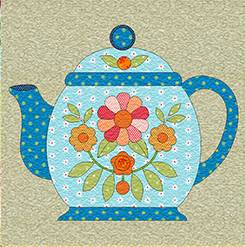
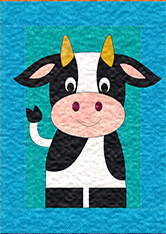
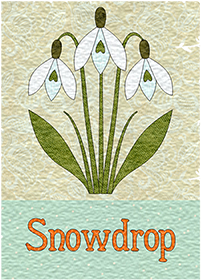
- Quilt Blocks: Create captivating quilt blocks with reverse applique designs. They can be the focal point or scattered throughout your quilt.
- Clothing and Accessories: Take your sewing skills beyond quilts and apply reverse applique to garments, bags, or even home decor items like pillows or table runners.
- Wall Hangings: Design unique wall hangings that showcase the intricate beauty of reverse applique. They can be standalone pieces of art or part of a larger quilted composition.
Why Choose Reverse Applique?
Now you might be wondering, “Why should I incorporate reverse applique into my quilting projects?” Well, here are a few compelling reasons:
- Creativity Unleashed: Reverse applique allows you to push the boundaries of your creativity. With this technique, you can experiment with different fabric combinations, textures, and design possibilities to achieve truly one-of-a-kind results.
- Visual Depth and Texture: By layering fabrics and revealing hidden applique pieces, reverse applique adds depth and texture to your quilts. This technique creates a three-dimensional effect that will captivate both the eye and the touch.
- Versatility: Reverse applique can be applied to a wide range of projects, from quilts to garments and home decor items. Its versatility allows you to explore and incorporate this technique into various aspects of your sewing journey.
Frequently Asked Questions
Q: Can I use a sewing machine for reverse applique?
A: While reverse applique is traditionally done by hand, you can experiment with using a sewing machine for certain aspects of the process. However, keep in mind that hand sewing allows for more control and precision, especially when it comes to cutting away the excess fabric.
Q: What types of designs work well with reverse applique?
A: Reverse applique is incredibly versatile, and a wide range of designs can be adapted to this technique. Simple shapes like circles, stars, or hearts are great starting points for beginners. As you gain confidence, you can explore more intricate designs, such as animals, flowers, or geometric patterns.
Q: Can I combine reverse applique with other applique techniques?
A: Absolutely! Reverse applique can be combined with other applique methods, such as raw-edge applique or needle-turn applique. This opens up a world of possibilities and allows you to create even more dynamic and visually appealing designs.
Get Hands-On with Reverse Applique!
Are you excited to give reverse applique a try? Below you can watch hands-on video tutorial that will guide you through the entire process, providing detailed information on materials, techniques, and troubleshooting tips. Grab your supplies, watch the video, and let your creativity flow!
As you can see, reverse applique is NOT my forté . 😊 I love, love, love molas, so this is a technique I continue to practice and am trying to get better at.
Remember, reverse applique is a skill that develops with practice. So, don’t be discouraged if your first attempt doesn’t turn out as expected. Embrace the learning process and enjoy the journey of discovering this captivating technique.
Now it’s your turn to join the world of reverse applique and create stunning quilt designs that will leave a lasting impression. Unleash your creativity, explore new possibilities, and let your imagination soar. Happy stitching!
 I am a self-learner. I taught myself to sew and to quilt. And I taught myself how to draw. I love to dye my own fabrics, am a fanatic of free-motion quilting, and dabble with mixed media. I am a quilt designer and teacher, and design and publish my own line of quilt patterns. With this blog I would like to share the bits and pieces of my life.