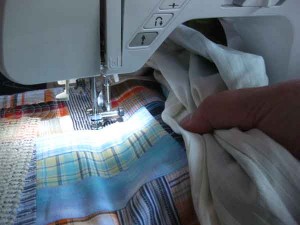
 Since I spent quite some time machine quilting Alexia and Julian’s quilts over the last couple of weeks before their departure, I thought I’d share a little of my learning process in this area. This might be of more interest for those of you who, like me, live in countries were quilting supplies are not readily available, and where we are especially limited in our choices of sewing machines. Maybe you will find my tips useful. 🙂
I am by no means an expert machine quilter. In fact, most of the time I tend to enjoy hand quilting over machine quilting ( I find it soooo relaxing). However, I am the first to admit that were I to hand quilt all my projects, I would really be limited as to the number I would be able to finish. So particularly when it comes to large quilts, as of late I have opted for machine quilting. The more I machine quilt, the more I realize how much practice, practice, practice is involved for slow improvements to take place. But there are so many other variables involved, too. Such as… the sewing machine you use. Read my post on that here. For the time being, I am going to leave the sewing machine issue out of the discussion, and focus on what really does work for me.
THE QUILT SANDWICH
While quilting several large quilts over the last year and going through the usual safety pin basting, I finally made the final move and have committed to spray basting. I don’t know why it took me so long. Cost is one factor, true. But then, so is my time. I am now spray basting all my quilts, and I will never, never go back to any other type of basting.
I have also resolved the problem of dealing with the bulk of a large quilt on a domestic sewing machine. I now divide and quilt all my large quilts in thirds:
1. I cut my backing fabric and batting about 4-5 inches larger than the quilt top all around. I lay down my layers in the usual order: backing, batting, and quilt top. (It helps to work on a large table for this, and I am fortunate to have one precisely for this purpose.) Starting from one of the sides, I fold back about a third of the quilt top. I then cut only the batting – I use a curvy “S” shaped motion for this. I remove the outside piece of the batting and fold the quilt top back down, over the backing. (Note: before removing the pieces of batting, I make sure to label them so I know which side is up, and can later fit them in without problems.)
2. I proceed exactly the same way (step 1, above) for the second side. After removing the batting, I continue to fold the quilt top back, until about the center of the quilt. I also fold the batting back and spray the backing with basting spray. I turn the batting down, and make sure it is sticking down right to the wavy edge onto the backing. I then spray baste the batting, and then fold the quilt top back down over it and smooth it out. I repeat this procedure for the first side.
3. I now turn the whole quilt over, so that the backing is facing up, and I smooth the fabric out. I lightly spray the outside edges of the backing and fold it over onto the quilt top. This is just to help keep the top and backing from flapping around.
3. Do you get the picture? At this point I have batting sandwiched only along the middle (center) third of the quilt. So I proceed to quilt that section. Once finished, I lay the quilt back down on the table and fold one of the sides of the quilt top back. I fit the piece of batting on that side, making sure the edges meet snuggly along the curved edge. In this case, I spray baste the batting first, then bring the quilt top back down over it, and smooth it out. I then turn the quilt over, lift the backing off and back, spray the batting, and bring the backing back down, smoothing it along all the way. I proceed to quilt that side, and then repeat for the other side (last third of the quilt).
GETTING A GRIP
When I first started machine quilting I found I couldn’t do it for too long of a sitting because my shoulders would start to ache from pushing and shoving a heavy quilt around. Eventually I started reading about what other quilters were doing and found time after time the recommendation to use quilting gloves. Now, there was no way I could find any specialty gloves here, but I did find a rubber-coated pair at the Home and Garden center, and was ecstatic to find they helped Oh, so much!
And then last year I was able to purchase the Supreme Slider and the Quilting Halo. Hallelujah! Well… almost. I still had problems with the drag of the quilt, and twice the Slider actually slid and folded over, and before I knew it, I had stitched through it. That problem has been resolved by taping it down before I lay the quilt over it. (Although it is kind of a pain with a top loading bobbin… oh, well.)
The Quilt Halo has been another issue. I found it limited my movements for larger quilting designs, so I finally decided to do without it for large quilts. I do use it for smaller projects, however, and in these cases I really like it and the fact that it gives me better control over my hand movements. And I do use it on larger quilts for the borders, for the same reason – a better grip when I’m running out of fabric on which to hold onto.
I did start to get uncomfortable with using the gloves, which is the main reason why I invested in the Quilt Halo. All the on and off of the gloves was driving me batty (have you ever tried to thread a needle wearing gloves?). And then one day, quite by chance, I happened to place the mat I use under the sewing machine (to keep it from sliding around) on top of a project. When I tried to slide it off… it gripped it instead. Do you know this stuff? This is what I am using now, instead of gloves.
When I machine quilt, I tend to hold the excess fabric/batting in my right hand…
And then grip the quilt with the piece of mat in my left hand…
And this is the most comfortable I have felt so far with my machine quilting! I hope you will find something useful in these tips. It works for me!


 I am a self-learner. I taught myself to sew and to quilt. And I taught myself how to draw. I love to dye my own fabrics, am a fanatic of free-motion quilting, and dabble with mixed media. I am a quilt designer and teacher, and design and publish my own line of quilt patterns. With this blog I would like to share the bits and pieces of my life.


5 Comments
Excelente post! Muy buenos consejos. La verdad no conozco ese aro ni el material que usas para evitar que se resbale el trabajo, pero alcanzo a darme una idea de cómo funcionan. Gracias.
I too love your post & insights. Many new tips. I also love the rubber mat grid material to use, in lieu of gloves. But, for me, it is also a good tool to rate between using gloves and the rubber mat tool, to ensure my shoulders/body doesn’t get too tight.
Great insights. Thanks.
SewCalGal
http://www.sewcalgal.blogspot.com
Wow!!! I use that stuff all the time in my kitchen and on my sewing machine foot pedal to keep it from sliding and keep my feet from sliding around. That’s a great tip! I have the Machingers gloves and I too find it drives me crazy every time I have to stop and bury a thread tail or thread a needle. luvvv it!
Thanks for the reminder. I, too, use it under the foot pedal. It’s a great product for these purposes, and super cheap, too!
I have some machine quilting to start this week. In Canada we call the product Scoot Guard. I have loads of it in our trailer forholding the platesin place while we travel. I’m bringing some into the house for the sewing room.
Thanks for the tip Angie.